¶ Eubrics BIP Guide – Step 3: Tag a User Batch
Once you’ve defined your BIP and added a mentor, the next step is to assign participants to the program by selecting a user batch. This helps organize learning and track progress for grouped users in a structured manner.
¶ Purpose of Tagging a Batch
Tagging a batch enables you to:
- Group participants under one program timeline.
- Ensure consistent delivery of learning material.
- Track progress and completion metrics for each batch.
- Enable batch-based analytics and leaderboard scoring.
¶ Where to Find This Step?
From the BIP setup menu on the left sidebar:
You're now on: User Batch
¶ How to Tag a Batch
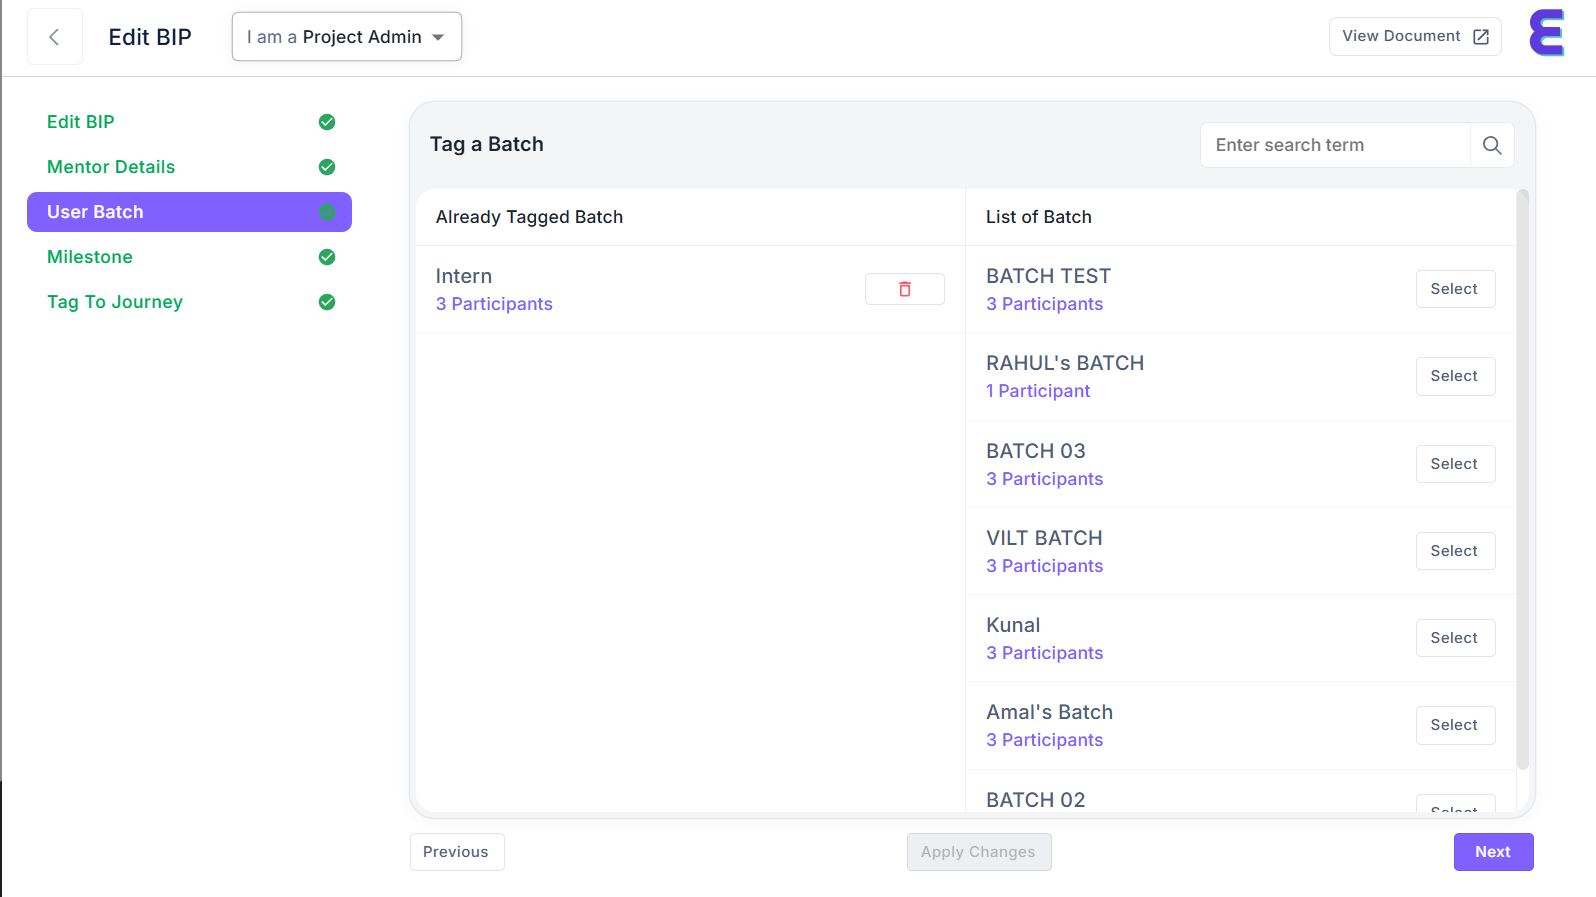
¶ 1. Explore Available Batches
On the right-hand side under "List of Batch", you will see all pre-configured user batches with their names and participant counts.
Example Batches:
BATCH TEST– 3 ParticipantsRAHUL's BATCH– 1 ParticipantVILT BATCH– 3 ParticipantsAmal’s Batch– 3 Participants
Each entry shows:
- Batch name
- Participant count
Selectbutton
¶ 2. Tag a Batch
Click the Select button beside the desired batch. The batch will instantly appear on the left under "Already Tagged Batch".
✅ You can tag multiple batches if required.
¶ 3. Review Tagged Batches
In the Already Tagged Batch section, you’ll see all batches added so far.
Each listed batch includes:
- Name (e.g.,
Intern) - Participant count link (e.g.,
3 Participants) - **Delete Icon ** — Click to remove a batch from the BIP if added by mistake.
¶ 4. Apply Changes
Click Apply Changes to finalize your batch selection.
¶ 5. Continue Setup
Click Next → to proceed to the Milestone configuration step.
¶ Search Functionality
Use the Search Bar at the top-right to filter available batches by name.
Example:
Typing VILT will only display batches with "VILT" in the title.
¶ Visual Overview
| Section | Purpose |
|---|---|
| Already Tagged Batch | Shows currently assigned batches to the BIP |
| List of Batch | Lists all available batches for selection |
| Select Button | Tags the batch to the current BIP |
| Apply Changes | Saves the selected batch assignments |
| Next | Proceeds to next step (Milestones) |
¶ Best Practices
- Assign batches with similar learning objectives or skill levels.
- Don't overload a single batch with too many participants.
- Use descriptive batch names for better tracking.
- Delete unnecessary batches before applying changes to avoid confusion.
¶ Navigation Controls
| Button | Action |
|---|---|
Previous |
Return to the Mentor Details step |
Apply Changes |
Save current batch assignments |
Next |
Proceed to Milestone setup |
¶ Need Help?
- Email: support@eubrics.com
- User Guide: Click the "View Document" button on the top right of your screen for more platform help.
Batches are the backbone of a successful BIP rollout. Assigning them correctly ensures a streamlined learning journey and targeted progress tracking for your users.